DN NA Class  

DN America Forums

April 25, 2024, 12:08:12 AM *
Welcome, Guest. Please login or register.

Login with username, password and session length
 
   Home   Help Search Login Register  
Pages: [1]
  Print  
Author Topic: Runner sharpening toolkit recommendations  (Read 44810 times)
Dusty Yevsky
Newbie

Posts: 9


« on: January 12, 2011, 12:07:26 PM »

I'm trying to get some sort of disciplined program for runner maintenance and I
need some basic tools. I can't say that I know very much about the subject. I've
read the Collected Wisdom and a couple of sources linked from this group so any
ancillary advice is also appreciated. Presently my only set of runners are Sarns
Bullnose but I foresee inserts in the future.

So far my kit includes:

A 18" hand held belt sander that has a platen of about 12".

A double-sided diamond hone stone with course & fine grits.

Feeler gauge.

I think I need:

A sharpening jig. I've read "Think Ice" and the authors highly recommend making
your own. This is within my capabilities though I'm a little leery of wood for a
precision fixture. Experience tells me that wood, even 3/4" maple plywood, moves
and then compromises the precision of the fixture. Anyone built one? Does anyone
like the Sarns jig? Will the Sarns jig accept insert runners?

Belts. I've currently got standard wood sanding belts but doubt these are going
to do anything to carbon steel. What kind of belts are good for steel? Any
links?

Reference edge. All the sources I've read say use a machinist's steel straight
edge. What's a good length? The price seems to go up exponentially with length.
I've also wondered if a machinist's granite plate would work as well as a steel
edge. The price per foot is about the same but a granite plate can be used for a
lot other things in a shop.

If I've overlooked anything please feel free to comment.


« Last Edit: January 12, 2011, 02:54:31 PM by Geoff Sobering » Logged
Geoff Sobering
Class Officer
***
Posts: 461


WWW
« Reply #1 on: January 12, 2011, 02:51:02 PM »

A stationary belt sander (aka edge sander) is really the best tool for sharpening runners.
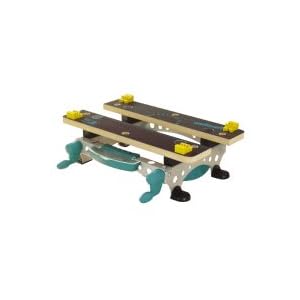
For example, at the "Nordhaus Boatwerks", we have got together and bought an 89x6" sander a couple of years ago:


Unfortunately, such machines aren't cheap, although you can sometimes find (relatively) inexpensive used machines for sale (that's how we got ours).

You can build your own around existing sander systems, or buy the parts for each end of the sander (ex. rollers and drive) and mount them on a custom base. I know many people who've done that; hopefully a few of them will post photos.

IMHO the Sarns jig is not very useful. Hopefully there will be some adherents who can post some tips and suggestions about using it. So far as I know it will only work with plate runners.

Independent of your sharpener, inexpensive Alumina belts (the brown ones) work well sharpening runners. They do wear out, but the cost is small.

For hand-stoning runners, I prefer the narrow abrasive stones (about 1/2"x1/4"x6") from Boride; Ron Sherry sells them in sells a nice kit of stones.

For more aggressive hand sharpening, I'm a fan of "super sandpaper". It's simply two sheets of sandpaper glued back-to-back and cut into small pieces. Ron Sherry stiffens his with a layer of Mylar sheet in between. I use a spare stone to back up my sheet and keep it flat.

Hand stoning and sharpening is an art. It is very easy to "roll" the stone/paper over the top of the edge and do more harm than good. With practice it's a very effective tool for minor tune-ups at regattas and such.

For holding runners during hand-sharpening/stoning, most people like the table-top "Workmate" style units, but they are hard to come by. Wolfcraft used to sell one, and Sears/Craftsman also had one in their product line.


You'll need two 0.008" feeler gauges. Many people use shim stock (esp. soft materials like brass and plastic that won't damage the runner edge). I've found the standard rosin-paper (used for laying floors) is almost exactly 0.008" thick (so at least here's one item that won't cost much!).

Steel straightedges and granite surface plates work well; you can also have a piece of steel I-beam ground flat in a machine-shop. It's important to remember that flatness to at least 0.001" is crucial; flatter is better.
We have both a stone and a rule at the shop. Our steel-rule is a bit flatter, so I use it for critical crown measurements, but the stone is way more convenient because we have it mounted at eye height with a light behind (you can see it above the sharpener in the photo above) so gravity holds the runner down while you look at the edge as you rock the runner back and forth. I have a very flat stone in my home shop, so that's all I use there.
For length, all you need is something as long as the edge part of your longest runner. For DNs 36" should be enough. I forget if our rule and stones are 36" or 48" long.

I hope this helps.

Cheers,

Geoff S.
US-5156

« Last Edit: January 12, 2011, 03:09:06 PM by Geoff Sobering » Logged

Man Why You Even Got to Do a Thing
Ken Smith
ADMIN

Posts: 289


sail often, travel light


« Reply #2 on: January 12, 2011, 03:30:32 PM »

Sarns jigs can work, but are difficult to control.  Edge sander or special runner sanding table highly recommended.  Its the final results that matter.  The rest is how to get there.

The collective wisdom lays out the process well.

I use an edge sander from Grizzley.  New was acceptably cheap.  Have long wanted a portable sanding machine, have sketches and never got around to building one.

Tools required/recommended:

Sanding table with 36 inch or longer belt contact area, adjustable so you can grind the desired angles.  (Sarns fixtures and belt sanders, use with caution and fine grit belts.  Like Hippocrates, avoid harm.)

Light table.  Basically a flat edge and a light source so you can touch the sharp edge and the straight surface and look at the light shining past the bumps and hollows, if any, and see the contact profile.

two .008 shims.  Used with the light table.  See the reprints in Collective wisdom regarding runner terms.  Distance between shims in the profile/straight edge gap is ".008 flat" dimension.

A laser level or pointer for checking edge straightness.

A spare chock or fixture to simulate a chock.  Used with the laser to check edge straightness.  Pooint the edge at a string hanging on the far wall.

A method to align the chocks parallel on your plank.

Stones, diamond sharpeners or w/d sandpaper and a 3/4 by 3 inch flat block


Process: 

Initial work  (a "new" pair takes about 4 hours): 
1.  Get the profile right using the sanding table and light table.
2.  Get the pair to be identical when set in the chock fixture and using the laser pointer.  This also gets the edges straight.  Hardest task.  Most important so runners become interchangeable.  Your runners match when you put either one in the chock fixture and the laser anywhere on the working edge points to the same spot  (plumb string) on the opposite wall.
3.  Use stones and/or sandpaper on blocks to polish the edges.

Process:  Sand, check on light table, check on chock fixture, repeat.


Maintenance work:

When dings or dullness happens
1.  Use stones, diamond boards or sand paper to attempt to remove nicks and sharpen.  If succcessful, check profile and straightness.  Whew, done (less than an hour)

2.  If big dings or lack of success with 1, the use the sanding belt to restore edges just like initial work.  They are still parallel and match (check anyway), so total time more like 1-2 hours, including the polishing.

Sharp runners will shave fingernail surface.

Logged

Ken Smith
DN4137US
Bob Gray
Class Member
*
Posts: 194


« Reply #3 on: January 12, 2011, 06:09:57 PM »

   First of all I agree 100% with Geof and Ken, I have a couple of points to add. It is very important to check the profile of a runner only when it has been cooled down from the sanding procedure. If checked hot, you "will" get an erroneous view of the actual edge. You can spend most of your time waiting for the blade to air cool or you can made a tray and cool the bottom inch or two in ice water. I've found about 4 or 5 minutes in the bath is all that's required. When I'm working on a very flat set, I'll leave them outside overnight and recheck them in the morning and often find them needing a touchup. The second thing is the checking of the edge straightness with a laser. If the projected light line from the laser isn't exactly parallel to the edge of the runner i.e. if it's angled off , you won't get a true result. The more it's angled off, the more the edge will appear to run off one way or the other. I hope ths helps.
                                                    Bob    US 65
Logged
Pages: [1]
  Print  
 
Jump to:  

Powered by MySQL Powered by PHP Powered by SMF 1.1 RC3 | SMF © 2001-2006, Lewis Media Valid XHTML 1.0! Valid CSS!